I’ve gotten emails from people griping that my previous post about making a guestbook for their WordPress blogs does not work for them. I’m making up for that lame post right now!
Ok, I am writing this post under the assumption that:
- You have FTP access to your web server containing your WordPress installation.
- You have admin access to the blog you’re making a guestbook for.
- You know basic HTML editing.
- You can tell the difference between regular text, HTML and PHP variables.
1. The very first thing to do is open up your theme folder saved in your computer. Look for the file named “single.php”.

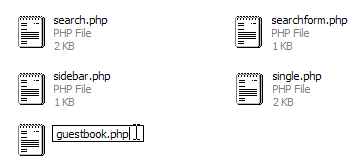
2. Copy (Ctrl-C) the file and Paste it (Ctrl-V). The file will automatically be named “Copy of single.php”. Rename the file to “guestbook.php”.

3. Open up guestbook.php in your favorite text editor (e.g. Notepad, UltraEdit).
On top of the file, right before:
<?php get_header(); ?>
Add:
<?php

/*

Template Name: Guestbook

*/

?>
Save the file (Ctrl-S). What we just did is create a separate template for your guestbook, which we will use when we create the new page. Customize other portions of the file as needed.
4. Open up your FTP program. Change directory to your current theme folder.
Ex. blogdomain.com/wp-content/themes/theme_name/
5. Upload guestbook.php.
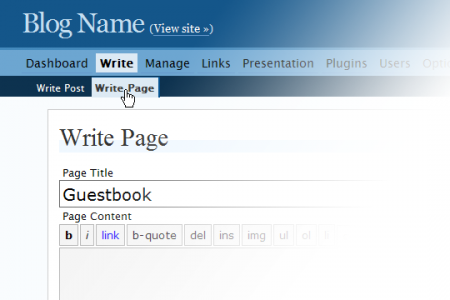
6. Access your Wordress admin panel to Write > Page to create a new page.

Type “Guestbook” as the page title. Compose a brief introduction for the page content.
Ex. Please Sign My Guestbook!
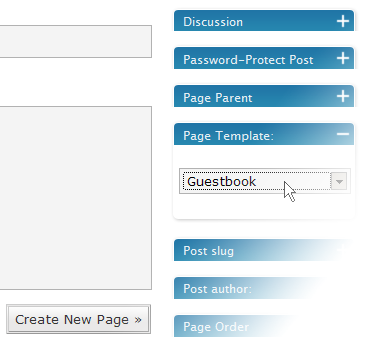
7. On the right-hand side, pick Guestbook as the page template.

8. Save the page. If you don’t want your guestbook to display the post date, browse to Presentation > Theme Editor > guestbook.php
Look for:
<?php the_time('Y/m/d') ?>
And delete it. Click Update File to save.
9. If you want to change the way the guestbook entries and the input form appear, here’s how. Copy comments.php and save it as ‘guestcomments.php’. Edit the file to your liking. Some samples:
Change the comment heading “X comments” to “X guestbook entries”
Change the submit button text “Post Comment” to “Sign Guestbook” or “Sign It!”
Change “Your comment is awaiting moderation” to “Your guestbook entry is awaiting moderation”
Text may differ from to template to template, so look for approximate matches in your files.
To reverse the order of comments, look for:
foreach ($comments as $comment)
and replace with:
foreach (array_reverse($comments) as $comment)
Upload guestcomments.php to the current theme folder on the server.
10. Once again, open up guestbook.php in the Theme Editor. Scroll below and change the line:
<?php comments_template(); ?>
to
<?php comments_template('/guestcomments.php'); ?>
Voila! You now have a guestbook!
I tried my best to make these instructions as painless as possible. If you’re still having issues, please don’t hesitate to leave me a note. Enjoy your new guestbook.
If you ‘dugg’ this article, click here to digg it!
Update: WordPress Generator Plugin is a sparkly new plugin that does all the dirty work for you!

Hi there, thanks for the code and all the instruction. I am now using guestbook. But I have got a problem, the page doesn’t breaks automatically or what I mean to say is, all the comments are on the same page instead of breaking up! How can I do so, I mean I want latest 5 0r 10 comments on the first and then older on the secondary page.. I am not able to configure it out. Please help me.
Thank you.
dude ! this is a good way of making simple guestbook in WP. may be location could make it much better, but still this is awesome.
thank you
Mihir
什么是guestbook呀?
And as this page proves, spam is out of control with the guest book pages..sigh
maybe I got confused with something else, but I thought this guestbook plugin allowed guests the option to upload files/images as well ??
If not, can it be done???